


At Fabrics Print, it is often said: a beautiful textile print always starts with a good file. That you are brand creator, event professional or simply passionate about customization, you may have already encountered printing problems once your design was transferred to fabric, clothing or accessory.
It's normal: in the world of textile printing, some simple but frequent errors can completely ruin a well thought out project. White background that comes out when we didn't want it, blurred image once printed, visual cut or staggered.. These are mistakes we see every day. And the good news is that they are easy to avoid, with the right reflexes !
In this article, Print Fabrics shares the 5 most common errors we see when preparing files, and above all, how to avoid them.
The goal? Let your creation be as successful on textile as it is on screen. Whether you're a graphic designer or not, our tips are there to help you gain independence, time... and quality.
| Frequent error | Consequences | How to avoid |
|---|---|---|
| File not flattened | Problems with displaying or printing certain elements (invisible effects, moved layers) | Flatten the layers before export (in Photoshop: Layer > Flatten image) |
| File exported for the web (72 IPR, RGB) | Visual blurred, pixelized, or in altered colors | Export in 300 DPI, PNG or PDF high quality, in CMYK or RGB HD |
| White background on DTF visual | A white square is printed around the pattern | Remove the background and export in PNG with transparent background |
| Image too small or poor quality | Loss of sharpness, made amateur | Use an image of at least 1500 px wide (or our IA generator) |
| No safety margins | Motif cut or poorly centered | Leave 3 to 5 mm margin and center your visual in our tool |
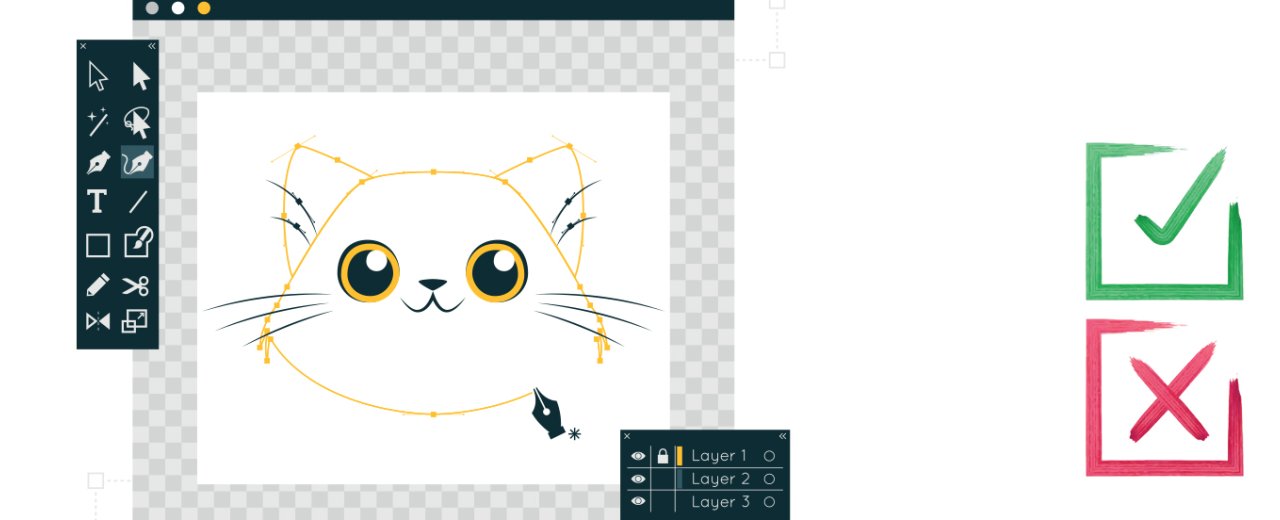
1. Do not flatten your file before sending
Problem: Unflatted file can cause printing errors
When you work your visual in software like Photoshop, Illustrator or any other graphical creation tool, you probably use layers, des dynamic effects, or vector objects. It's very practical to design a design... but if file is not flattened before sending, this can cause several technical problems at the time of printing.
Why? Because some information (dark effects, transparency, masks, smart objects, non-vectorized fonts, etc.) are not always correctly interpreted by RIP software (those used to drive printers).
Result: Your visual may appear distorted, incomplete or different from what you see on the screen, even becoming inoperable for textile printing.
Risks:
- Effects invisible or removed from printing
- Impaired or unsynchronised layers
- File rejected or requiring manual correction (loss of time)
The solution: flatten your file before export
Before recording your final visual, always take the time to flatten. This means that you turn all your layers, effects and objects into a fixed image, as it must appear at printing.
How ?
- In Photoshop : go to the Layer menu > Flatten image
- In Illustrator : vector the text (Text > Vectorize) and use Object > Pixelliser if necessary
- Check that your file is in 300 IPRS and that all transparent areas are kept where necessary (especially in DTF)
The advantage ?
By sending us a flattened file:
- You avoid any risk of misinterpretation of the visual,
- You save time in the production process,
- And you have the guarantee of result true to your design.
At Fabrics Print, our goal is to enhance your creation, not to correct it. However, we propose that bAT service before printing.
A well prepared file is the key to a clean, clean and professional textile printing from the first trial.
2. Export your file for the web
The problem: a web file is not suitable for printing
This is a frequent mistake, especially for those who start or use online design tools: exporting their file in "web" quality, i.e 72 IPR (screen resolution), often in JPEG or compressed PNG.
The concern is that this quality is sufficient for an Instagram publication or a website... but not at all for printing on textiles. The image will be blurred, the details will lack sharpness, and the colors can be shifted.
Risks:
- Blur or pixel printing
- Loss of fine detail
- Dark or imprecise colours
- File refusal if quality is insufficient
The solution: export in high resolution for printing
For professional printing, your file must meet quality standards of printing.
To be undertaken:
- Resolution: 300 DPI minimum.
- Format: PNG (transparent background), PDF HD or TIFF according to your design.
- Colour mode: High quality RGB or CMYK depending on your tool with an applied color profile.
- Sufficient image size: e.g. 3500 x 5000 px for a type A3 pattern.
The advantage ?
High resolution file allows printing net, faithful and qualitative, whatever textile is chosen. And at Fabrics Print, we print what you see... so as much to see great (and net) from the start !
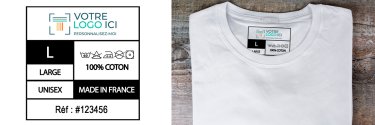
3. Add a white background instead of a transparent background (DTF)
The problem: the background white is printed with the visual
In DTF (Direct To Film) textile printing, each pixel is printed as it including whites. Unlike other techniques, there is no "default transparency". If you leave a white background in your file (often invisible on a clear background), it will be printed entirely on textile.
This often leads to unwanted rendering, with a white frame visible around your pattern.
Risks:
- White square or rectangle around logo or visual
- Loss of finesse in cutting
- Visually amateur result
The solution: use a transparent background
To avoid this problem, you must:
- Remove the white background from your design,
- Export to PNG with transparency enabled, or in format Flattened PSD with transparent layer.
Good to know:
Do not confuse "white background" and "invisible background": only a PNG with real transparency allows a clear rendering.
If you use Canva, Photoshop or our image generator IA, think about enabling transparency at the time of download.
The advantage ?
Your design fits perfectly into the textile, without visible contours, for a pro, clean and elegant look.
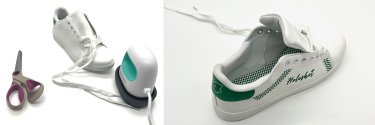
4. Use a poor image (or too small)
The problem: to enlarge a small image degrades its quality
On a screen, a small image may seem clear... but at printing, everything is played out in pixels. If you send us an image too small (e.g. 600 x 400 px), it will be enlarged to fit the print format, which will cause blur, pixelization, and loss of detail.
This is the most frustrating error: the design is good, but the rendering is blurred because the file was not sufficiently defined.
Risks:
- Visual blurry or "granular" once printed
- Bad rendering of fine lines or text
- Perception of poor quality by the end customer
The solution: use high definition files
For a clear impression, you must anticipate the final print size. For example:
- For type A4: at least 2500 px wide
- For an A3 pattern: 3500 px and more
Good to know:
In our customization tool, an alert will appear if the file quality is insufficient.
If you don't have HD visuals, our IA generator can create a custom image directly in high resolution.
The advantage ?
You get a clean and clean impression, even on large textile surfaces (sweets, bags, XL t-shirts...).
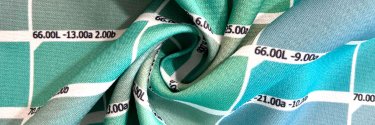
5. Do not provide safety margins
The problem: a pattern too close to the edge can be cut
In printing, it is always necessary to anticipate the tolerances of cutting and placement. If your visual is placed too close to the edge of the support (t-shirt, bag, etc.), part of the design can be trimmed during transfer.
This also applies to designs containing frames, fine lines or texts glued to the edge: the rendering may seem poorly centered or misadjusted, even if the file appears to be well placed on the screen.
Risks:
- Partial adjustment or cutting of the visual
- Unbalanced aesthetics
- Poor readability of the message
The solution: providing safety margins
Before validating your design, be sure to:
- Leave 3 to 5 mm margin around your visual,
- Avoid important texts or elements at the border,
- Centre your pattern in the customization area.
Tip:
In our online tool, visual cues guide you to remember nothing. Think of using them for a balanced layout.
The advantage ?
A design well placed, well centered, no bad surprise at printing, which enhances your brand image or event.
Conclusion
Preparing a file for textile printing may seem technical at first, but with the right reflexes, you make sure a impeccable result, faithful to your design.
At Fabrics Print, our mission is clear: to accompany you at every stage to transform your ideas into professional quality textile creations.
In short, to avoid bad printing surprises, keep in mind these 5 mistakes not to be made :
- Never send an unflatten file,
- Do not use an exported file for the web (72 dpi),
- Always remove the white background if you print in DTF,
- Check the size and quality of your image,
- Think about safety margins to avoid cut patterns.
And if you don't have a designer or design software, no panic : our image generator IA and our online customization tool are there to simplify your life, even without technical competence.
Printing in France, neat finishes, OEKO-TEX certified inks With Fabric Print, your projects deserve the best of personalized textiles.
Ready to create without stress ?
Test our online tool now or let our AI generate your custom visual !
And if you have any doubt, our team is here to check your file before printing. At home, it is quality above all.


0 commentaires